Take a moment to evaluate the total costs of undergoing at least eight sessions of professional laser hair removal—typically the estimated duration needed to achieve significant hair regrowth reduction—against the one-time purchase price of the Philips Lumea SC2009. Is investing in this device worthwhile? Imagine experiencing a remarkable 75% reduction in hair regrowth in just eight weeks, all from the convenience of your own home.
Can the Philips Lumea SC2009 be trusted? With over a million women having successfully utilized this IPL hair removal device and expressing satisfaction with the results, it certainly stands out as a product worthy of endorsement. As at-home IPL hair removal continues to gain popularity, more advanced devices are entering the market, making it accessible to a wider audience.
This article will guide you through the proper usage of the Philips Lumea SC2009 IPL hair removal device, outline its key features, and emphasize the advantages of opting for at-home hair removal.
Is the Philips Lumea IPL SC2009 a Good Investment?
When weighing the costs of purchasing the device against the expenses associated with salon hair removal treatments, or when considering the effectiveness of performing treatments at home, the Philips Lumea IPL offers numerous benefits. Although laser hair removal has been a reliable method for years and is utilized globally, it often comes with a hefty price tag.
Here are several compelling reasons why the Philips Lumea IPL SC2009 is worth considering:
Review of Philips Lumea SC2009
The Philips Lumea SC2009 is an innovative at-home hair removal device that employs Intense Pulsed Light technology. It is not only safe and efficient but also lightweight, weighing less than 500 grams, which prevents hand fatigue during use. The intuitive design allows for comfortable handling, making it user-friendly.
This device includes specialized attachments tailored for specific areas of the face, legs, and body to ensure precise treatments. The conveniently located flash button allows for easy access, and changing the attachments takes less than a minute.
The Lumea SC2009 features two treatment modes: a flash mode suited for smaller areas like the bikini line, and a slide mode designed for larger areas such as the legs.
Moreover, it operates cordless, does not require any gels, and utilizes no lamps during the process.
Components of the Philips Lumea SC2009
In addition to the IPL hair removal device, the package includes several essential components:
Curved Body Attachment
This curved attachment is designed for efficient hair removal across the legs, abdomen, arms, and back. Its exterior features an icon representing the body for easy identification.
Flat Facial Attachment
Removing hair from your face can be delicate, particularly if it’s your first experience. The flat flash window is specifically designed to ensure full contact with the skin, minimizing the risk of stray flashes that could potentially harm the eyes.
Curved Precision Attachment
The smallest attachment, ideal for targeted areas like the bikini line and underarms, is marked with a bikini symbol for easy identification.
A Charger
The Philips Lumea features a built-in battery that requires charging.
Additional accessories included in the box are a user manual and a convenient storage pouch.
How to Use the Philips Lumea IPL Hair Removal Device
If you are using an IPL hair removal device for the first time, it's helpful to understand that these devices emit gentle light pulses absorbed by the hair follicles, pushing the hair into a resting phase. To ensure safety, this particular IPL model comes equipped with a UV filter to protect your skin from any harmful rays.
Follow these steps to effectively use the Philips Lumea SC2009:
Step 1: Prepare the Area
Before treatment, shave the targeted area thoroughly, ensuring it is clean and dry. If you choose to wax, make sure to do so at least a day in advance.
Step 2: Unbox and Clean the Device and Attachments
For optimal performance, wipe down the IPL device and its attachments to eliminate dust or any particles that may hinder the flash window and skin tone sensor.
Step 3: Select the Body Part and Attachment
Firmly attach the appropriate component designed for the area you plan to treat.
Step 4: Connect the Device to Power
Plug the device into a wall socket and power it on by pressing the on/off button located at the bottom.
Step 5: Adjust the Intensity Level
Choosing a higher intensity setting than necessary might lead to skin burns. Start with a simple test to find the right level. When the "ready" light is on, place the flash window on your skin and gradually increase the intensity, beginning with the lowest setting. Pay attention to any discomfort as you increase the level, selecting the highest one that remains comfortable.
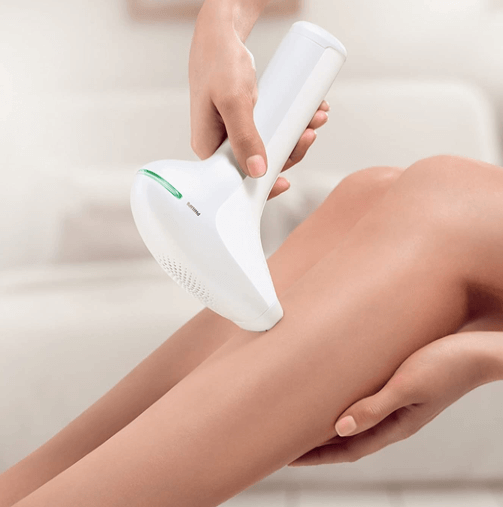
Step 6: Position the Philips Lumea on Your Skin
Hold the device perpendicular (90 degrees) to your skin and verify that it is in full contact, ensuring the Ready light turns green.
Step 7: Begin Your IPL Hair Removal Treatment
Once the light is green, press the flash button for the bikini area or face. For larger areas like the legs or arms, use the slide function to glide across the skin. After completing your treatment, turn off the device by pressing the on/off button.
Conclusion
Utilizing the Philips Lumea IPL hair removal device is straightforward and efficient, provided you understand your skin tone and the required light intensity. Start by attaching the correct flash window, ensure the device is charged, adjust the light intensity accordingly, and hold it at a 90-degree angle to your skin. Finally, glide or flash over the designated areas that you wish to treat.